Wood floors have a number of advantages, especially their non-toxic natural appeal. They are also much easier to handle in the cleaning department compared to carpet floors and harbour fewer dust mites and germs, making them better for people suffering from allergies.
However, they do lose their shine after a while and are susceptible to damage, like everything else. In order to restore them to their former glory, you’ll require a specialist’s kit, which includes a floor sander, a hammer, and sandpaper.
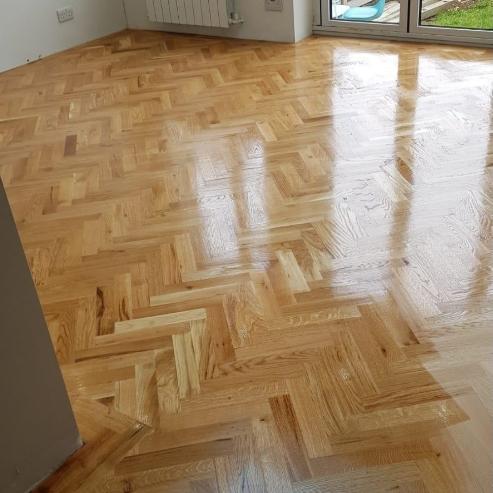
Just follow the steps given below to sand your wood floorboards.
- Close your doors, open your windows and don safety goggles and a fine dust mask. Remove all the carpets and the furniture and start inspecting – it is crucial that no nails stick outside since that could damage the floor sander.
- You should fill the gaps in your floorboards for a better sanding experience. For large holes or gaps, stick thin strips of glue-covered wood inside the gaps. You can utilize papier mache for small gaps. For making this mache, you’ll need to mix some stiff paste, wallpaper adhesive, and torn newspaper strips. Consider adding water-based wood-coloured dye for matching the floor. Force this into the floor’s gaps, smooth it off, and leave it for a while to dry.
- You can now sand the floor using coarse sandpaper. In case you’re utilizing an electric floor sander, you’ll have to fit sandpaper and ensure that it’s tight around its drum. You can go through the manual or contact customer support to ensure you don’t make any mistakes. Begin from one side of the room, which will leave around 2/3rd of the wood floor exposed in the front. Switch the sander on, walk forward & ease the drum onto the floor. When you reach the sandpaper strip’s end, raise this drum off your floor with caution.
If you’re using a handheld floor sander, ensure the sandpaper has been loaded tight, activate it off your floor and then lower it slowly. Sand along with the grain and move it from one side to another slowly. Once you reach the sandpaper strip’s end, turn it in the shape of a semicircle. Ensure you’ve unplugged the sander before changing the sandpaper.
- Once you’ve completed sanding, proceed to vacuum everything after the dust in the room has settled down. Use a cloth dipped in white spirit for wiping the floor. Let it dry for a while. Use varnish to spruce up its looks.
How to Repair Wood Floorboards?
We recommend repairing wood floorboards instead of replacing them. While them up, it is best to utilize brass screws over nails since they will protect old plaster ceilings and lath below from the hammer’s blows.
Make sure you follow these tips to the letter while repairing your damaged floorboards
- Glue and stick split boards together wherever possible with the help of screws, which you can drill in the edges of these boards.
- Give some time for your new timber boards to acclimatize before using them, which will minimize shrinkage.
- Repair the edges, corners, and broken ends with the right wood species that matches the floorboard’s grain pattern.
Strengthen weak floorboards by fixing new boards on their underside or by running a new batten underneath it for support
Almar Furniture & Floor Restoration and French Polishing, 1 Duke Humphrey Rd, Blackheath, London, SE3 0TU, 0203 475 9866.
Wood Floor Sanding Service Blackheath & Greenwich
See also What does an upholsterer do